All scripts for accessibility

All the scripts that help you to make your InDesign files more accessible are explained here.

If you want to prepare the data for a PDF/UA in InDesign, there is a lot to do.

Alternative texts, languages, separations and more are the topics that the Octopus scripts can help you with:


Script: Check Alt text

Which link does not yet have an alternative text?

Images must have an alternative text or be defined as a "decorative image". But which image does this apply to? Which one still needs to be edited?
This script shows you how.
"Hide all links with alt text" hides all links that already have one. This means for you: You have to edit the ones you still see.
"Hide all decorative links" hides these images. They are also called "artifacts", i.e. images that play no role in understanding the content.

This means you know exactly which images and graphics you still need to take care of. Cool, right?

"Creator marker level" gives you an overview of the links and their alternative text on an extra level.

If you click the“Create marker layer” button, the Octopus creates a new layer in your document.

At this level, frames in different colors are generated to indicate whether a link frame has an alternative text (green frame) or whether it has been declared a “decorative image” (blue frame). Or whether neither has taken place (red frame).

The alternative text, if available, is inserted into the frame. This is a good idea if you want to export a PDF of it, for example, so that someone who does not have InDesign can check the text.

Restrictions

The Octopus is aware that this representation of the alternative text on the marker level has limits. If the text is too long for the size of the text frame, it becomes cramped…

If we come up with a better idea on how to solve the problem, we’ll post an update!

Do you have an idea? Write to us: support@project-octopus.net

Script: Check Articles

Page objects are hidden

The script simply hides all objects that are in any "article". Simply click on "Hide frames in articles".
You will then only see the text and image frames that are not integrated into the article structure.
Now you just need to assess whether this is OK and intervene if necessary.
If you see a text frame that should be in an article, you can now intervene here. Use the InDesign tools to do this. You don't need any help from Octopus.

Huh? Article?

If you export a PDF from the InDesign file that is later to be read aloud by a screen reader, the correct order of the texts is important. You can control this with the “Articles” palette.

And the Octopus script “Article control” helps you to keep an overview.

All objects, for example text or image frames, that are managed in the article palette are hidden when you click the “Hide frames in articles” button.

By clicking on the button again, which is now called “Show frames in articles”, all frames are shown again.

This happens even if you close the script window.


Script: Check End of line

Gross typesetting errors will be corrected!

Yes, I know. The statement is harsh! But what is it about?
Three types of errors are corrected with the script.

If a – (minus sign) is inserted to separate a word, a screen reader reads it out exactly as it is, i.e. with the “minus” sign. If InDesign’s hyphenation function is active, this does not happen.
Correction: The script replaces it with the “Conditional hyphen”.

If with “Forced line break” is used, but no space is used in front of it, the screen reader will recognize both words as one word will be read as one word.
Correction: The script inserts a space.

If a – (minus sign) is inserted to separate a word, a screen reader reads it out exactly as it is, i.e. with the “minus” sign. If InDesign’s hyphenation function is active, this does not happen.
Correction: The script replaces it with the “Conditional hyphen”.

GREP search

The searches and changes performed by the script are based on the GREP functionality in “Find/Replace” in InDesign.

The great thing is that you don’t need to know anything about GREP to use it – the Octopus does it for you!

But if you want, call “Find/Replace” after using the script for the first time. You will find these three expressions in the “Queries”.

Location 1/2: This shows you how many problem areas the script currently finds in the document.

This is followed by an indication of which problem type is currently displayed.

There is “∴ Octopus forced line break“, Octopus incorrect separators” and “Octopus multiple spaces“.

Use“Previous reference” and“Next reference” to jump from one to the other.

Correct: This corrects the problem at this location.

Correct all of this type: This corrects all the locations of the type.
Please pay close attention to what you are doing!

Re-search: If you make changes to the text while the script is running, it is sometimes a good idea to re-search the script through the text and update the display.

Tip for professionals

The script is programmed to look in this folder on your hard disk:

Windows: ...\AppData\Roaming\Adobe\InDesign\[Version]\[language]\Find-Change Queries\GREP
macOS: .../Library/Preferences/Adobe InDesign/[Version]/[language]/Find-Change Queries/GREP

All GREP queries stored there, which are started with are taken into account in the script! This way you can add your personal corrections.

However, 🐙 says: “At your own risk!”

Script: Check Language

Which language is defined?

First, the script determines all languages that are used in the document. Then it counts the characters and calculates percentages.

The texts are then highlighted in color according to their language. For reasons of clarity, the marking of the main language (more than 50%) is hidden. However, it can of course be displayed.

How are the colored markings made?

This is what the Octopus does via “Conditional text”. Don’t worry. When the script is closed, the markers are deleted. Your document will not be permanently changed.

In order for the screen reader to be able to read out the PDF in the correct language later, it needs to know which language is the correct one!
This can already be set in InDesign. You should also do this to avoid additional work in the PDF .
The language can be set individually for each character. However, it is better to do this in the paragraph formats or character formats!
If you have set these formats correctly and used them consistently, everything is fine!
But you can't check this in InDesign!
The "Language check" script helps here.

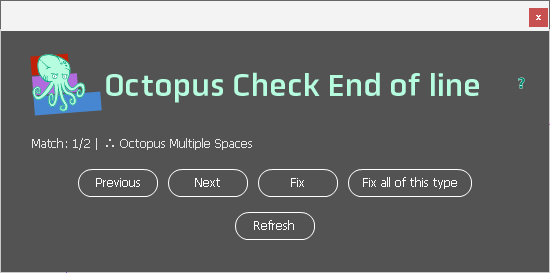
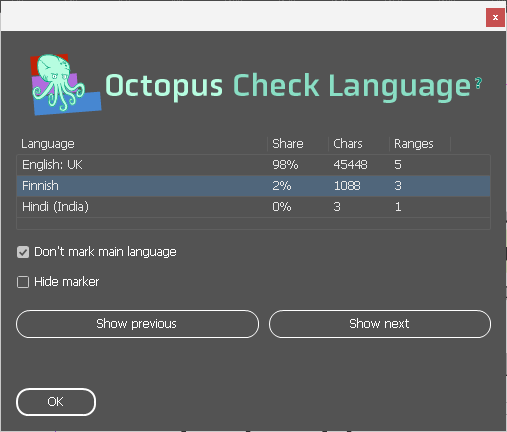
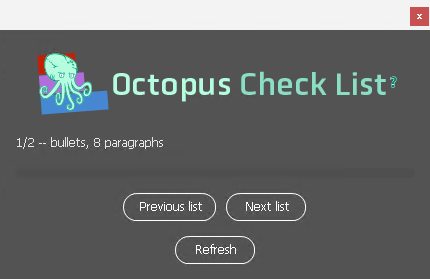
You can use the “Show previous” and “Show next” buttons to call up the individual texts in their respective languages if you want to check whether they are correct.

If it is not correct, you will have to correct it yourself. The Octopus can’t take care of everything! 🐙

If the text is in the overflow, this is displayed in the window:

Script: Add Bookmark

PDF/UA needs bookmark

The script helps you to make bookmarks. This works based on paragraph format or character format or by GREP search for words in the pages.
The application is very easy to use and - poof - your InDesign document has beautiful bookmarks.

Script: Add Hyperlinks

The script can do hyperlinks better than InDesign

Sure, InDesign can also recognize URLs and email addresses and automatically turn them into real hyperlinks.
But they look like this:

Whether URL or e-mail address, it always says “Hyperlink”. Boring! And impractical when managing many hyperlinks.

The InDesign solution also has a problem with umlauts or a note in the URL.

The Octopus is more diligent: it assigns speaking names that help you find your way through a long list. And umlauts and notes are of course no problem.

In addition, the new generic top-level domains (new gTLDs) and https links are taken into account. InDesign does not manage this ¯\(°_o)/¯

Download the Octopus installer here:

WordPress Cookie Plugin by Real Cookie Banner